Connecting the Untangle
In order to connect the Untangle to the network:
- Ensure the modem or other ISP provided equipment is in bridge mode. Anyone familiar with the local network setup will be able to assist with this.
- Note: If the IP address is static, it will be necessary to load this information into the Untangle.
- Connect the router to the modem provided by the ISP, ensuring that it is the only device connected. All other devices will connect to the router or a switch connected to the router.
- In most cases, the router can be accessed locally at 192.168.0.1 or 192.168.1.1.
Creating a Bypass Rule
Untangle firewalls use bypass rules to allow traffic to bypass firewall rules, packet inspections, and session timeouts (UDP timeout).
- From the dashboard navigate to config
- Once on the config tab navigate to Bypass Rules

- First, select and remove the rule " Bypass VoIP (SIP) Sessions".
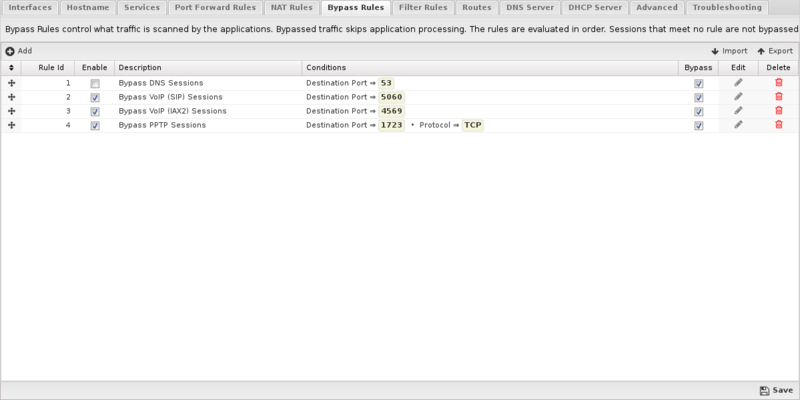
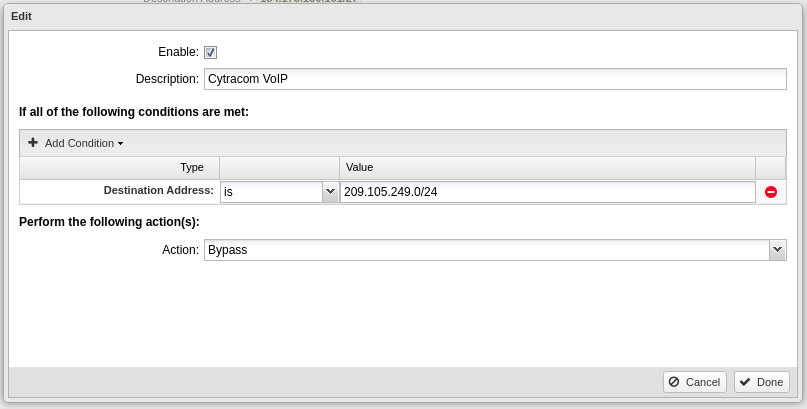
- Select Add to create a new bypass rule, a new dialog box will pop up
- Description: Cytracom VoIP
- Destination Address is 209.105.249.0/24
- Set the action to Bypass
- Select Done
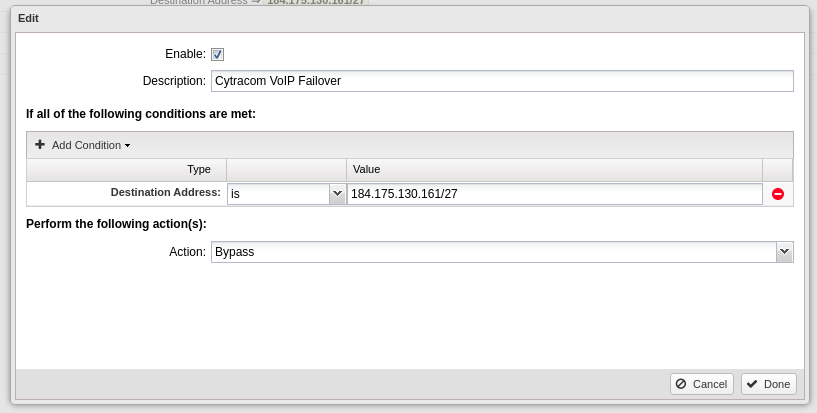
- Select add to create a new bypass rule, a new dialog box will pop up
- Description: Cytracom VoIP Failover
- Destination Address is 184.175.130.161/27
- Set the action to Bypass
- Select Done
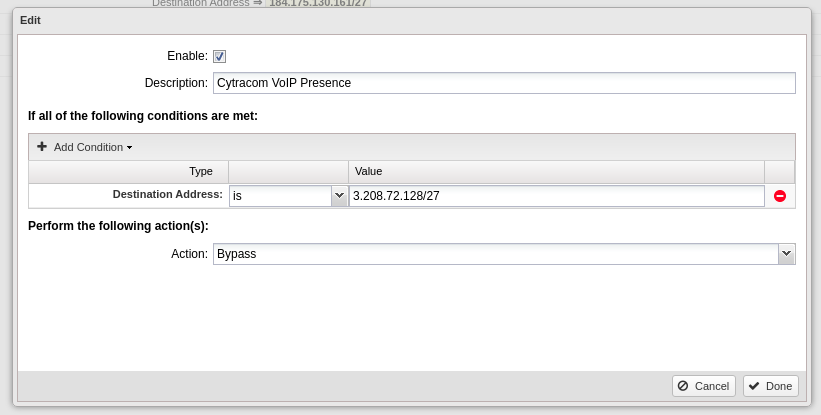
- Select add to create a new bypass rule, a new dialog box will pop up
- Description: Cytracom VoIP Presence
- Destination Address is 3.208.72.128/27
- Set the action to Bypass
- Select Done
Once you have selected done the box will disappear and you will be returned to the Bypass menu. The changes will now need to be saved by selecting Save at the bottom right-hand corner of the window. When you select to save it will commit the change and update the running-config.
Firewall Ruleset
- Navigate to Apps then select Firewall. (Note: GUI may look slightly different depending on the use of Firewall or Firewall lite apps).
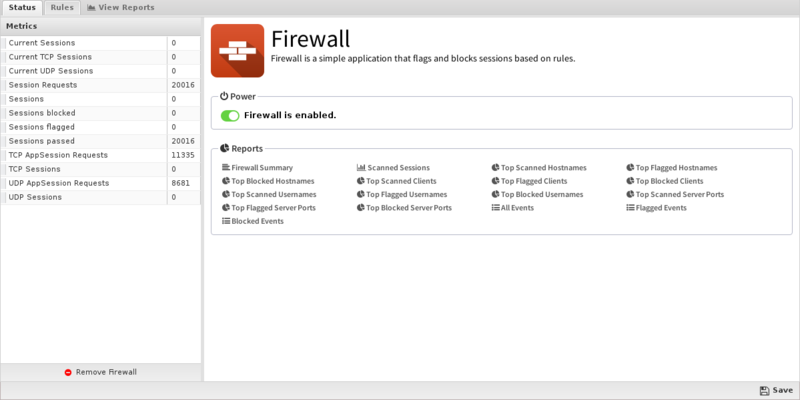
- Navigate to the Rules tab, and select Add to create a new rule.
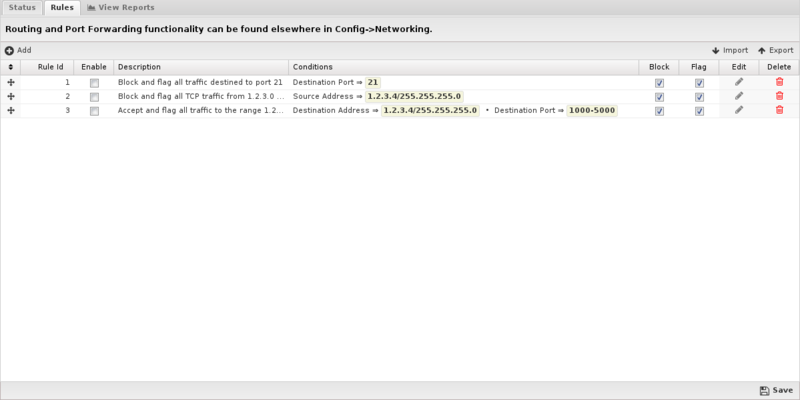
- Check Enable
- Description: Cytracom VoIP
- Add condition:
- Selet Destination Address
- Once the condition is created the first drop down will be set to IS and the value is 209.105.249.0/24.
- Action Type: Pass
- Select Done at the bottom right
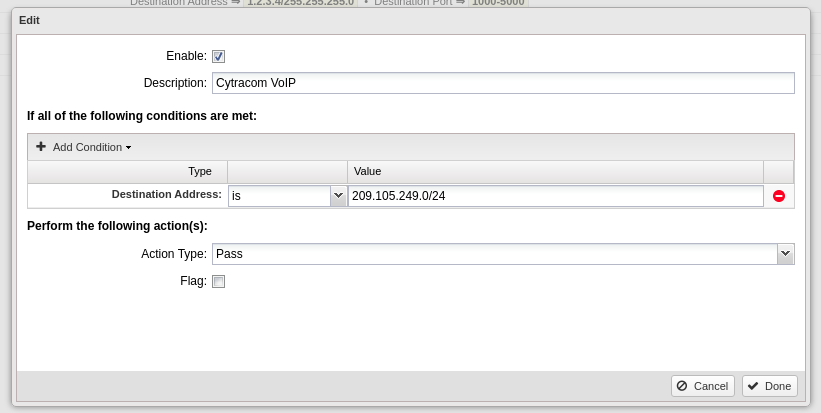
- Check Enable
- Description: Cytracom VoIP Failover
- Add condition:
- Destination Address.
- Once the condition is created the first drop down will be set to IS and the value is 184.175.130.161/27.
- Action Type: Pass
- Select Done at the bottom right
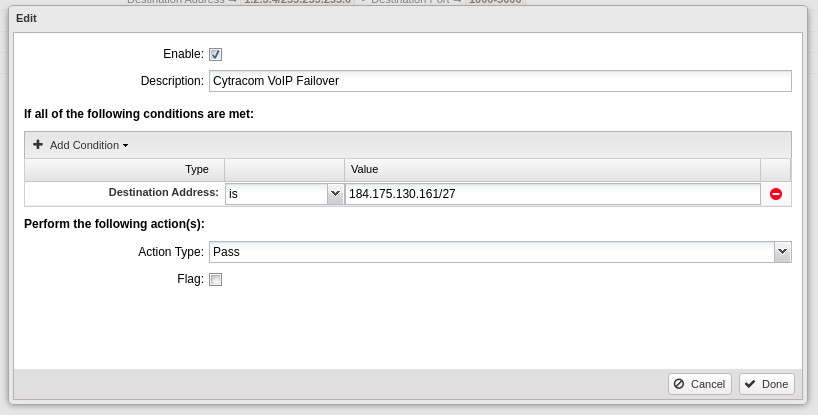
- Check Enable
- Description: Cytracom VoIP Presence
- Add condition:
- Destination Address.
- Once the condition is created the first drop down will be set to IS and the value is 3.208.72.128/27
- Action Type: Pass
- Select Done at the bottom right

- The dialog box will disappear and return you to the Rules screen. Once there you will need to select Save at the bottom right of the screen to commit the changes.
Advanced Setting/QoS Setup
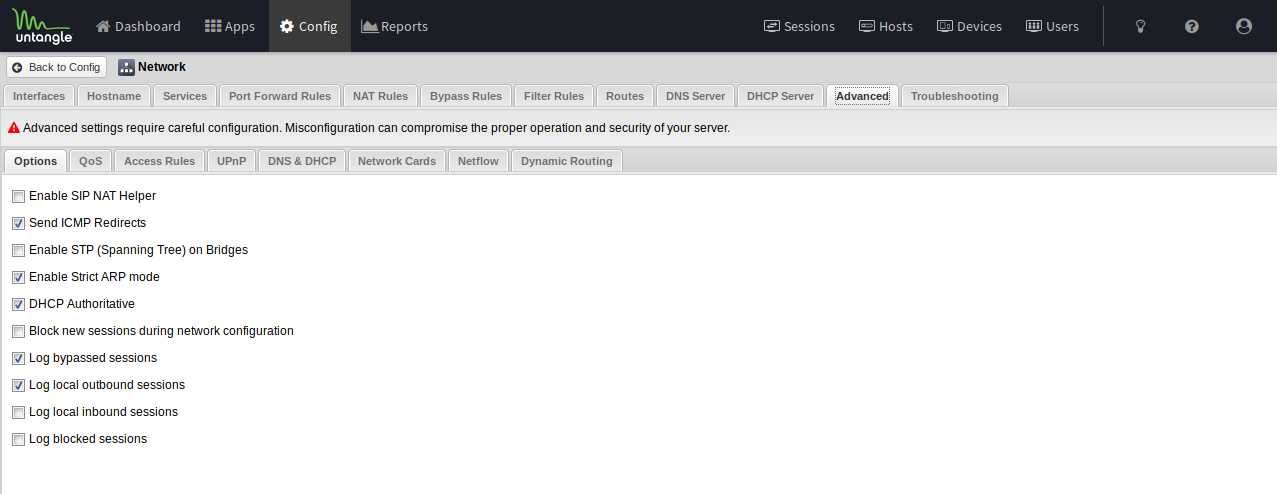
- Navigate to Config
- Navigate to Advanced
- Navigate to Options
- Ensure that "Enable SIP NAT Helper" is unchecked
- Navigate to QoS
- In Queue Discipline select FairFlow Queueing + Codel
- Check the box Qos Enabled
- Navigate to WAN Bandwidth and below Download/Upload Bandwidth enter the respective bandwidth parameters
- Once the bandwidth has been updated you will need to select Save at the bottom right of the screen to commit the changes

- Navigate to the QoS tab.
- By default, there should be a VoIP (SIP) Traffic rule in place and enabled. Select this rule and delete it.

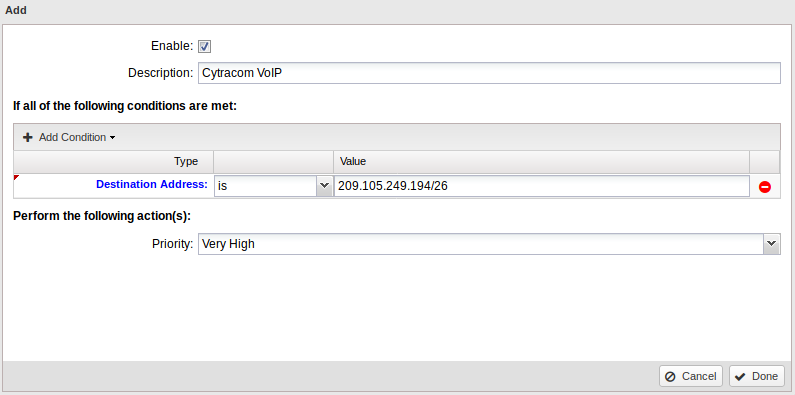
- Select + Add to create a new rule (Lefthand side just above the first custom rule.)
- A custom rule dialog box will appear
- Check the enable box
- Name the rule Cytracom VoIP
- Select "Add Condition" and choose "Destination Address"
- In the value field of "Destination Address" enter 209.105.249.0/24
- Set the priority as Very High
- Select done at the bottom right-hand corner of the dialog box
- Select + Add to create a new rule (Lefthand side just above the first custom rule.)
- A custom rule dialog box will appear
- Check the enable box
- Name the rule Cytracom VoIP
- Select "Add Condition" and choose "Destination Address"
- In the value field of "Destination Address" enter 184.175.130.161/27
- Set the priority as Very High
- Select done at the bottom right-hand corner of the dialog box

- Select + Add to create a new rule (Lefthand side just above the first custom rule.)
- A custom rule dialog box will appear.
- Check the enable box.
- Name the rule Cytracom VoIP
- Select "Add Condition" and choose "Destination Address".
- In the value field of "Destination Address" enter 3.208.72.128/27
- Set the priority as Very High
- Select done at the bottom right-hand corner of the dialog box

- The dialog box will disappear and return you to the Rules screen. Once there you will need to select Save at the bottom right of the screen to commit the changes.
- All phones will need to be rebooted after changes are completed