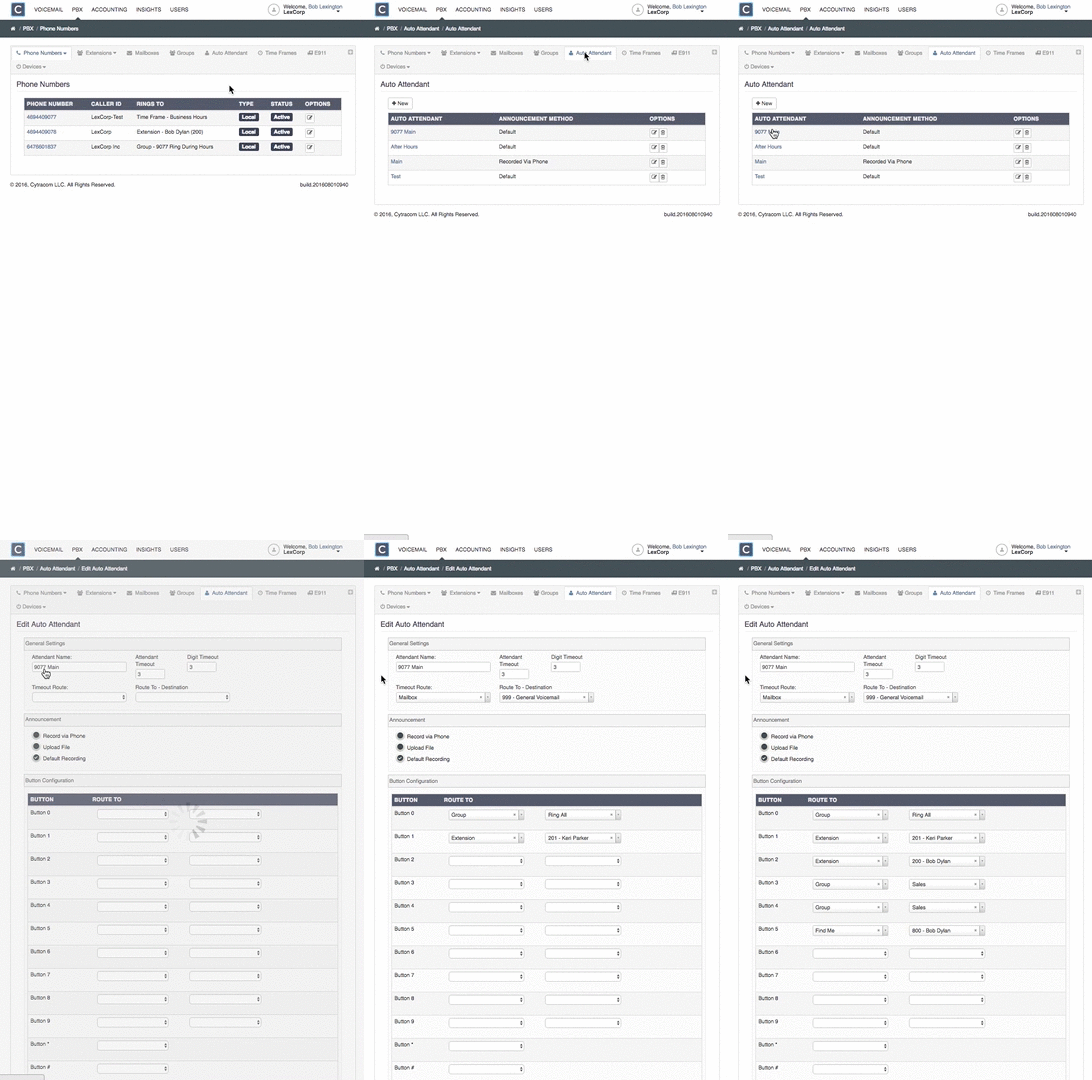
Auto Attendants route calls based on the input of the caller. The caller will listen for options to dial a specific extension or group such as, press 1 for Support or 2 for Sales.
Note: Auto Attendants work well for businesses that have different departments.
Creating an Auto Attendant:
- In the PBX, click on
Auto Attendanton the menu bar. - Click
+ New. - Key in the
Auto Attendant Name. - Set the Attendant Timeout. This is the amount of time a caller has to key in their selection.
- Set the Digit Timeout. This is the amount of time a caller has between each key they press.
Select the Timeout Route. The call will be routed to this destination if the caller does not make a selection within the time set via attendant timeout.Select the method for the Announcement:- Record via Phone - Record the announcement directly from the phone using the code given when this option is selected. If selecting this option, configure the auto attendant and then select submit. After submitting, go back into the auto attendant to obtain the full dial string to record the greeting (*042xxxxxxx).
- Upload File - upload a .wav or mp3 file that is no larger than 10MB from the computer that has been previously recorded.
- Default Recording States - "Hello and thank you for calling. If you know your party's extension, you may dial it at any time. For a company directory, please press * now. To leave a message in our general company voice mailbox, continue to hold or press 1. To hear these options again, press 9 now. Thank you for calling."
Configure the desired buttonsand select a route to option. If a button is not needed, leave it blank.- Click
Submit.

Implementing the Auto Attendant into call routing (Example):
- Creating a new Auto Attendant will not automatically start being used in your call routing. To do this, the Auto Attendant must be set as a route destination.
- This example will show how to route a phone number to an Auto Attendant directly.
- In the PBX, click
Phone Numberson the menu bar. - Click on the number you need to set the Auto Attendant routing to.
- In the Number Routing Section under Standard Routing, set the
Defaultto Auto Attendant, andRoute To - Destinationto the name of the New Auto Attendant that was created.

- Click
Submit.