Topic
This article discusses how to use holiday call routing in Cytracom Desktop.
Environment
- Cytracom Desktop
Description
Creating a Holiday
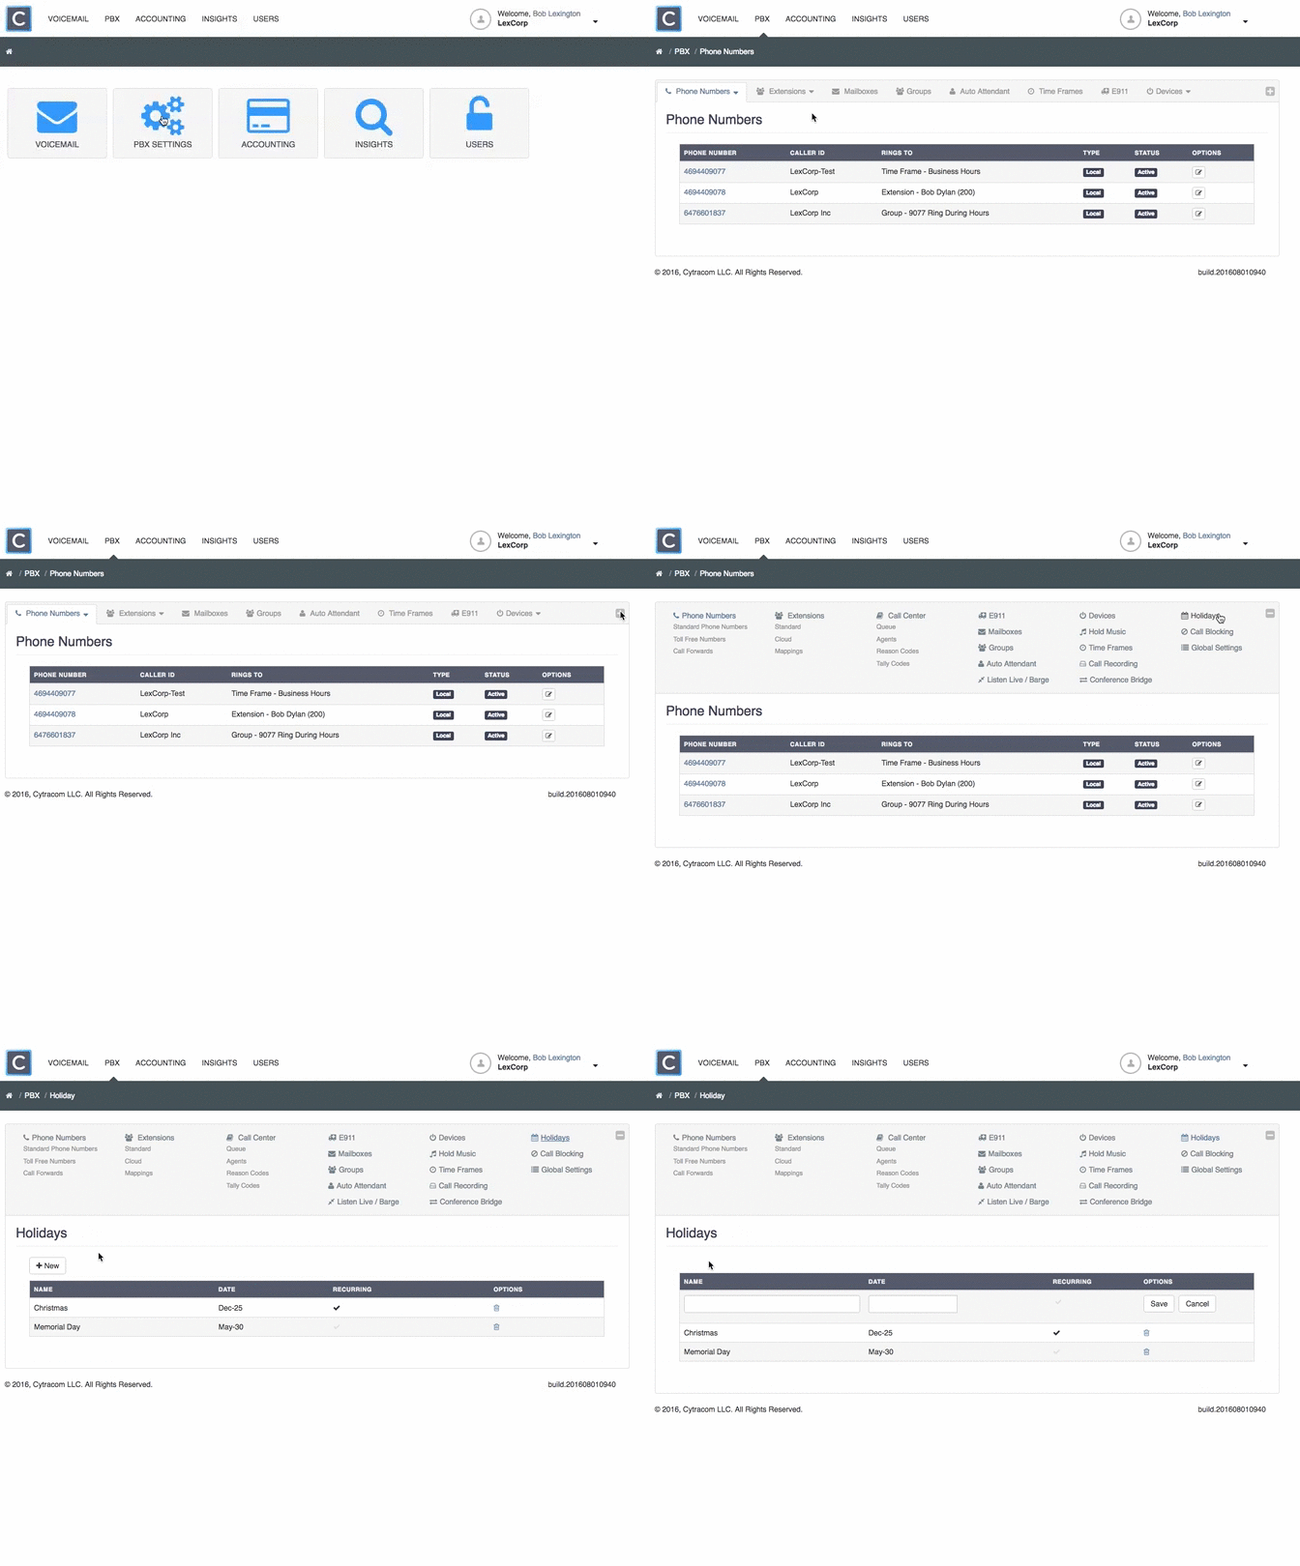
Holiday call routing will override normal call routing. Configure holidays by accessing the Holiday button in the PBX.
- Login at secure.cytracom.net.
- Once in the PBX, expand the menu by pressing the + on the right side of the menu bar.
- Click on Holiday.
- Click +New.
- Enter a name for the holiday.
- Click on the date field and choose the date from the drop down calendar.
- Choose if the holiday should be recurring or not.
Note: Only choose recurring if the holiday is repeated on the same date in subsequent years.
- Click Submit.

Once the holidays have been created, call routing can be configured.
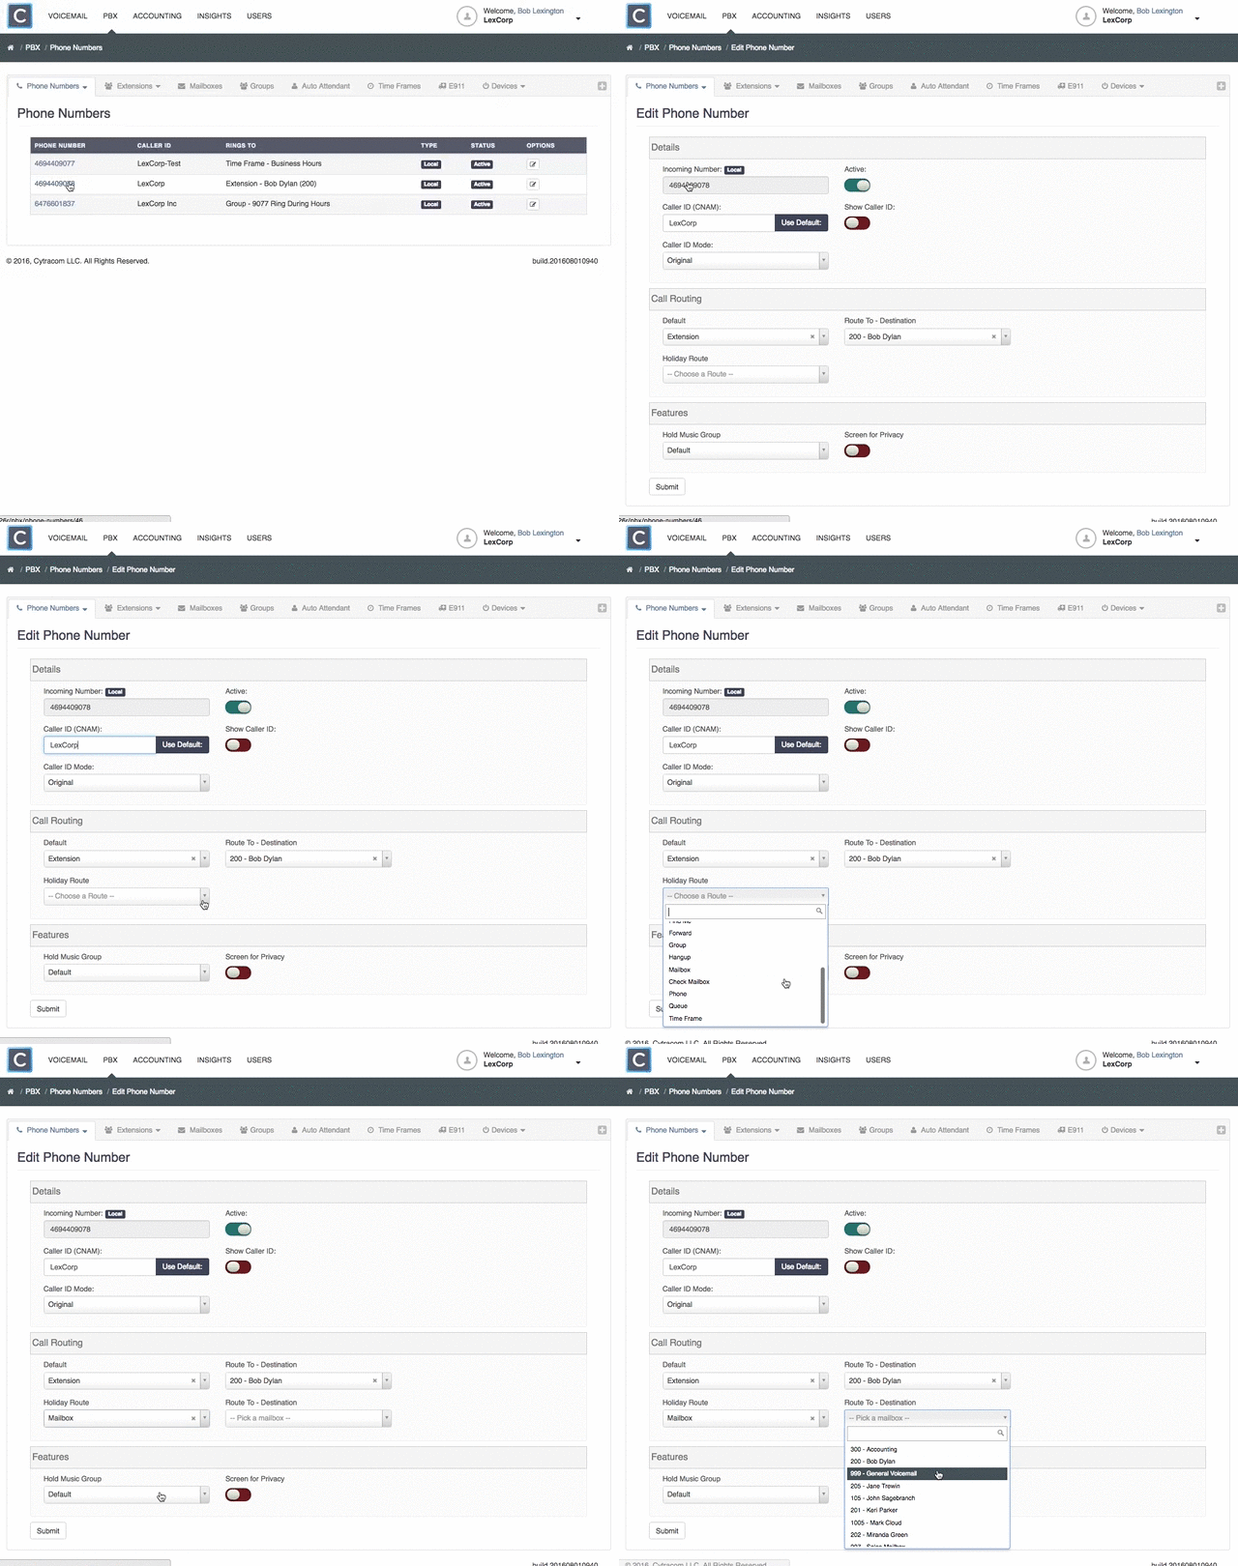
Adjusting Holiday Routes
- Click on Phone Numbers on the main menu of the PBX.
- Select the number that needs the holiday route.
- In the Holiday Route field, select a route and "Route To -Destination" from the drop down menus.
- Click Submit.
- Repeat the above steps for all necessary phone numbers.
Holiday Groups
Holiday Groups are holidays in which your business is open for partial days but less than your regular business hours. This allows an additional level of control over your holiday routes.
Creating Holiday Groups
1. Create a Holiday by following the steps above.
2. navigate to PBX Holidays and select the Holiday Groups tab.
3. Enter a Holiday Group name, holiday date, start and end times, and the time zone. When finished, click the Save button.
Phone numbers to which the Holiday Group is applied will not ring during the times set within the Holiday Group. For example, if you will only be open from 10am to 2pm, you must set two times within the Holiday Group for that date (12:01 am - 10:00am and 2:00pm to 11:59pm) to allow the phones to ring from 10am to 2pm but direct all calls outside of those hours to your desired Holiday route.
Still have questions? Click here to learn how to contact Cytracom Technical Support or open a ticket.
